Introduction:
In the fast-paced world of web hosting, finding a reliable and user-friendly solution to manage your AWS EC2 Instances can be a game-changer. Enter CasaOS – a cutting-edge platform that brings simplicity and efficiency to web hosting on the cloud. In this article, we’ll dive into the features and benefits of CasaOS and explore how it can revolutionize your web hosting experience.
What is CasaOS? CasaOS is an innovative web hosting management system designed to streamline the process of managing AWS EC2 Instances. Built with user-friendliness in mind, CasaOS offers a hassle-free interface, allowing users to deploy, configure, and monitor their web servers effortlessly. It acts as a bridge between you and your EC2 Instances, making the management process seamless and efficient.
Key Features of CasaOS:
- Intuitive Web Interface: One of the standout features of CasaOS is its intuitive web interface. Even for those new to web hosting, navigating through the platform is a breeze. The user-friendly dashboard provides clear insights into your EC2 Instances’ performance and resources, making it easy to keep track of your web server’s health.
- Easy Deployment: Setting up your web server has never been simpler. With CasaOS, you can deploy an AWS EC2 Instance with just a few clicks. Say goodbye to the complexities of manual configuration – CasaOS takes care of the technical details so you can focus on your website.
- Secure Management: Security is a top priority for any web server. CasaOS ensures that your AWS EC2 Instances are managed with utmost security measures in place. From firewall settings to SSL certificate management, CasaOS has got you covered.
- Resource Scaling: As your website grows, so do your resource needs. CasaOS makes it easy to scale your AWS EC2 Instances according to your traffic demands. With flexible resource allocation, you can handle high traffic spikes without breaking a sweat.
- Website Backup and Restore: Data loss is a nightmare for any website owner. CasaOS simplifies the backup and restoration process, giving you peace of mind knowing that your data is secure and easily recoverable.
- Monitoring and Analytics: Keep track of your web server’s performance with CasaOS’s monitoring and analytics tools. Detailed insights into CPU usage, RAM utilization, and network traffic help you optimize your server for better efficiency.
How to Get Started with CasaOS: Getting started with CasaOS is a breeze. Follow these simple steps to make the most of this powerful web hosting management system:
- Sign Up: Visit the CasaOS website and sign up for an account. It’s quick, easy, and the perfect gateway to a hassle-free web hosting experience.
- Connect AWS Account: Once you’re signed up, connect your AWS account to CasaOS. This integration will allow CasaOS to access and manage your EC2 Instances seamlessly.
- Deploy EC2 Instances: With your AWS account connected, you can now deploy new EC2 Instances directly from the CasaOS dashboard. Select your desired configuration, and CasaOS will handle the rest.
- Monitor and Manage: Keep an eye on your web server’s performance using CasaOS’s monitoring and management tools. Adjust resource allocation, set up backups, and manage security settings, all in one place.
Step-by-step guide on how to set up CasaOS on an AWS EC2 Instance
Prerequisites:
- An AWS account with appropriate permissions to create and manage EC2 instances.
- Basic knowledge of AWS services and how to launch an EC2 instance.
Step 1: Launch an AWS EC2 Instance
- Sign in to your AWS Management Console.
- Navigate to the EC2 Dashboard.
- Click on “Launch Instance” to start the instance creation wizard.
- Choose an Amazon Machine Image (AMI) that suits your needs. A popular choice is the “Ubuntu Server” AMI.
- Select an instance type based on your website’s requirements. For starters, you can use a general-purpose instance like t2.micro.
- Configure the instance details, such as the number of instances, network settings, and storage.
- Add tags if needed to identify your instance easily.
- Configure security groups to control inbound and outbound traffic. Allow SSH (port 22) and HTTP/HTTPS (ports 80 and 443) to access the web server.
- Review your configurations and click “Launch” to create the EC2 instance.
Step 2: Connect to Your EC2 Instance via SSH
- Once the instance is launched, select it from the EC2 Dashboard.
- Click on “Connect” to get instructions on how to connect to your instance.
- Use a terminal or SSH client to connect to your EC2 instance using the provided command and your private key file (e.g.,
ssh -i key.pem ubuntu@your-aws-ip).
Step 3: Update and Install Required Packages
- Update the package list:
sudo apt update - Install Apache web server:
sudo apt install apache2 - Install PHP and its dependencies:
sudo apt install php libapache2-mod-php - Install MySQL server and secure the installation:
sudo apt install mysql-server
During installation, set a secure root password for MySQL.
Step 4: Enable Required Apache Modules
- Enable the Apache rewrite module:
sudo a2enmod rewrite - Restart Apache:
sudo systemctl restart apache2
Step 5: Install and Configure CasaOS
- Install CasaOS with the following command:
curl -fsSL https://get.casaos.io | bash- Once CasaOS is installed, you can access the management interface at
http://your-aws-ip:81using your web browser.
Step 6: Configure CasaOS and Secure the Web Server
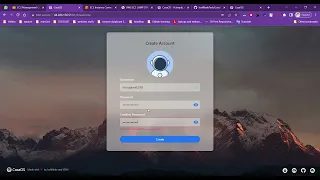
- Follow the on-screen instructions to set up CasaOS, including creating an admin user and configuring the initial settings.
- CasaOS will prompt you to configure security settings, such as firewall rules. Make sure to secure your server properly to prevent unauthorized access.
Step 7: Upload Your Website Files
- Use an FTP client or SCP to upload your website files to the appropriate directory on the EC2 instance. By default, the web server root is located at
/var/www/html/.
Step 8: Test Your Website
- Open your web browser and enter your AWS EC2 Instance’s public IP address or domain name to access your website.
Congratulations! You’ve successfully set up CasaOS on your AWS EC2 Instance and deployed your website. From now on, you can manage your web server easily through the CasaOS web interface, simplifying tasks like resource scaling, monitoring, and backups. Remember to regularly update your system, backup your data, and follow security best practices to ensure a secure and smooth hosting experience.
Conclusion:
CasaOS is a game-changer in the world of web hosting management. Its user-friendly interface, easy deployment, and powerful features make it the ideal choice for managing AWS EC2 Instances effortlessly. Whether you’re a seasoned web developer or just starting your online journey, CasaOS empowers you to focus on what matters most – your website’s content and growth.
Give CasaOS a try today and experience the future of web hosting management!
(Note: As technology evolves, always check the CasaOS website for the latest updates and features.)
Reference Link
CasaOS : https://casaos.io/
Vitabletech: http://vitabletech.in/
For more information visit our website
- Local Map Profile :- https://goo.gl/maps/PYr2eSAjqVL3Kw728
- Local Guides Connect :- https://www.localguidesconnect.com/t5... Twitter :- https://twitter.com/msrajawat298
- Facebook :-http://facebook.com/msrajawat298
- YouTube :- msrajawat298.
- LinkedIn :- https://www.linkedin.com/in/msrajawat298
- Blogger :- https://msrajawat298.blogspot.com
- Instagram :- https://www.instagram.com/msrajawat298/
- Google Page :- https://msrajawat298.business.site/
#CasaOS #AWS #EC2Instance #WebHosting #WebServer #CloudHosting #WebDevelopment #WebsiteManagement #TechTutorial #WebHostingSolution #WebHostingManagement #CasaOSBlog #ServerManagement #AWSWebServer #CasaOSWebHosting #WebServerTutorial #AWSHosting #CasaOSFeatures #WebServerManagement #WebServerSetup #AWSManagement #WebHostingGuide


